
A jam is a product made from ripe, fresh, dehydrated, frozen, or previously packed fruits, such as fruit juices, pulp, fruit juice concentrate, or dry fruit. The processes of jam making starts with boiling its pieces, pulp, or puree with nutritive sweeteners like sugar, dextrose , invert sugar, or liquid glucose until it has the right consistency. It could also have fruit pieces and other ingredients that go well with the product. It can be made from any suitable fruits, alone or with others. It should taste like the original fruit without burnt, unpleasant, or crystallization.
Jam Making Processes/Stages
–
1. Inspect
Ripe, firm fruits for jam making are selected and graded based on color and sensory appeal. The rotten fruits are removed from the harvest. Hand-picking and color sorters may be used to do this.
Wash
200 ppm of chlorine can be added to water to clean fruits well. The pH and temperature should be kept at the same level to keep fruits from getting damaged or bruised. In industries, dump washers and spray washers can be used.
Peel
Fruits can be peeled by hand, like an orange or an apple. In most industries, peeling is done with mechanical peelers and automated peeling machines with blades. Some fruits don’t require peeling. Some fruits with hard stones inside need to be pitted.
2. Pulp
By pulping, the seed and middle part are taken out. Fruits like mangoes, peaches, tomatoes, bananas, draw berries, and more can be pulped with several different machines. The space between the sieve and the rotor can be changed to fit materials of different sizes and qualities that need to be pulsed.
3. Add Sugar
The pulp or juice of the fruit is mixed with the right amount of sugar and pectin. If you need to, you can add water. Sugar sticks to the water molecules, which lets the pectin chains move around and make their network. The jam gets firmer when you add more pectin, and when you add more sugar, it gets sticky.
4. Boil
The most essential step in processing of jam making is boiling, which takes a lot more time. After putting the mixture on the stove, we must wait until the sugar dissolves. Slowly, the fruity smell will fill the room, and a foamy network of pectins may form on the surface of the jam. This is normal, and you can get rid of it by adding a little butter (about 20g) to break the surface tension or by skimming it off with a spoon while the mixture cools.
5. Add Citric Acid
During the boiling process, a certain amount of citric acid is added. For jam to set properly, we heat the mixture to 105°C or 68–70%TSS. To check for jams, you can also do a sheet test.
Sheet test: Take a small amount of jam on a spoon, cook it a bit, and let it drop. If it falls as a sheet or flakes, the jam is done. If not, boiling continues.
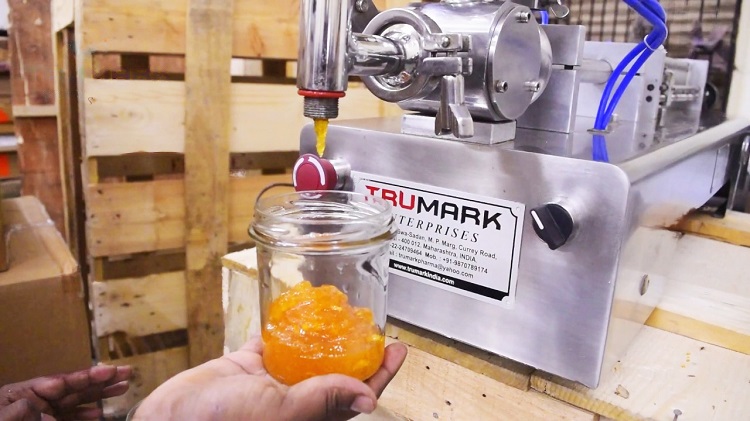
6. Fill Process
By using piston pump fillers, hot jam is put into sterilized jars. The jars are then vacuum-capped with metal lids, sent through a cooling tunnel, and their labels are put on. Getting the jam jars ready to be passed out. Either sell their jams directly to customers or to retailers.
Our jam filling machine is made of stainless steel and according to food product regulations. The PLC system works with it. While the main tank makes the right amount. It can hold between 100 ml and 5000 ml. The filling range can be changed to fit the desired basis weight.
The jam filling line includes all the equipment necessary to get your jam packaging machines up and running. From 10 to 50 bottles may be bottled each minute using this machine.
Automatic volumetric mechanical piston-action dosing and filling machines are perfect for liquid and pastry in glass, metal, or plastic containers and jam and mixed products with pieces.
7. Storage
Keep the filled jam in a cool, dry place out of the sun. About a year is how long a jam can will last. Now it’s finished! This mix of sugar and fruit can taste great, making any dull recipe into something extraordinary.